Backup and moving your clinic
Your clinic’s data lives on your device alone. Save a backup regularly, protect it with a password, restore it when you need to, or use it to move the clinic to a new device.
Watch this topic on videoOn this page
Why backups matter
Dentora sends nothing to the internet, which keeps your patients’ data private. It also means everything lives on this one device: if it breaks, gets lost or is stolen, the patient files, appointments and accounts go with it. A backup is your second copy, kept somewhere else.
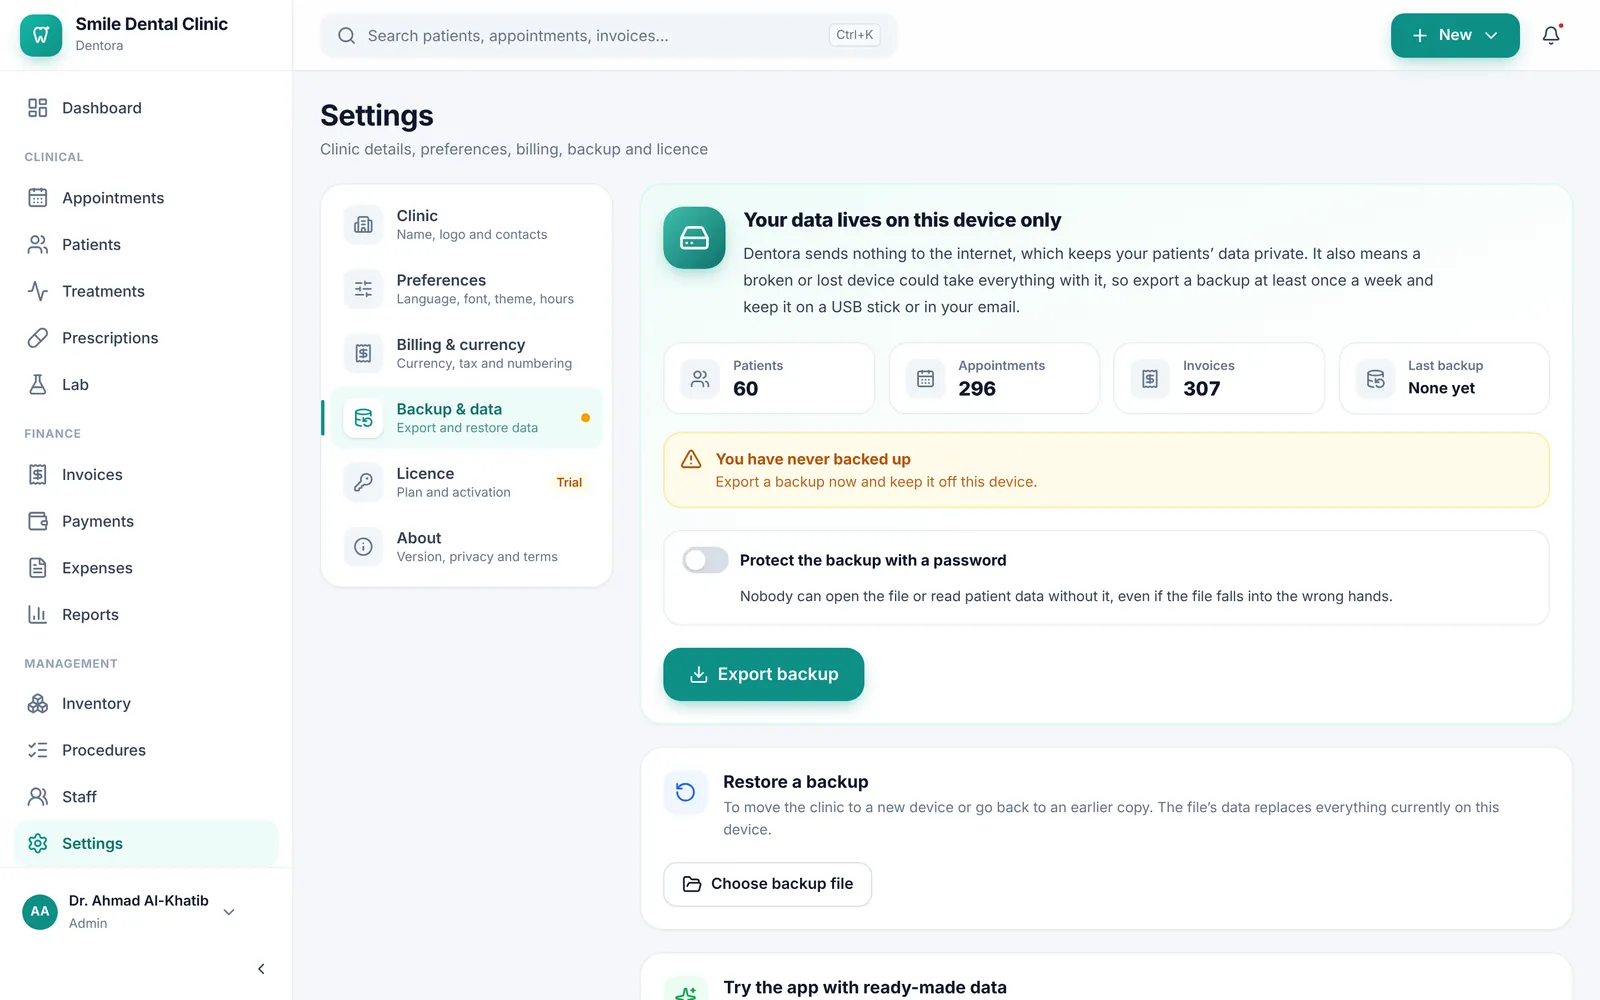
Open Settings, then Backup & data. At the top are the numbers of Patients, Appointments and Invoices, and the date of the Last backup. Under them a notice gives your backup’s state: yellow if you have never backed up or the last backup is a week old or more, green when it is recent.
The same page holds password protection, the Export backup button, Restore a backup, Try the app with ready-made data and the Danger zone.
Saving a backup
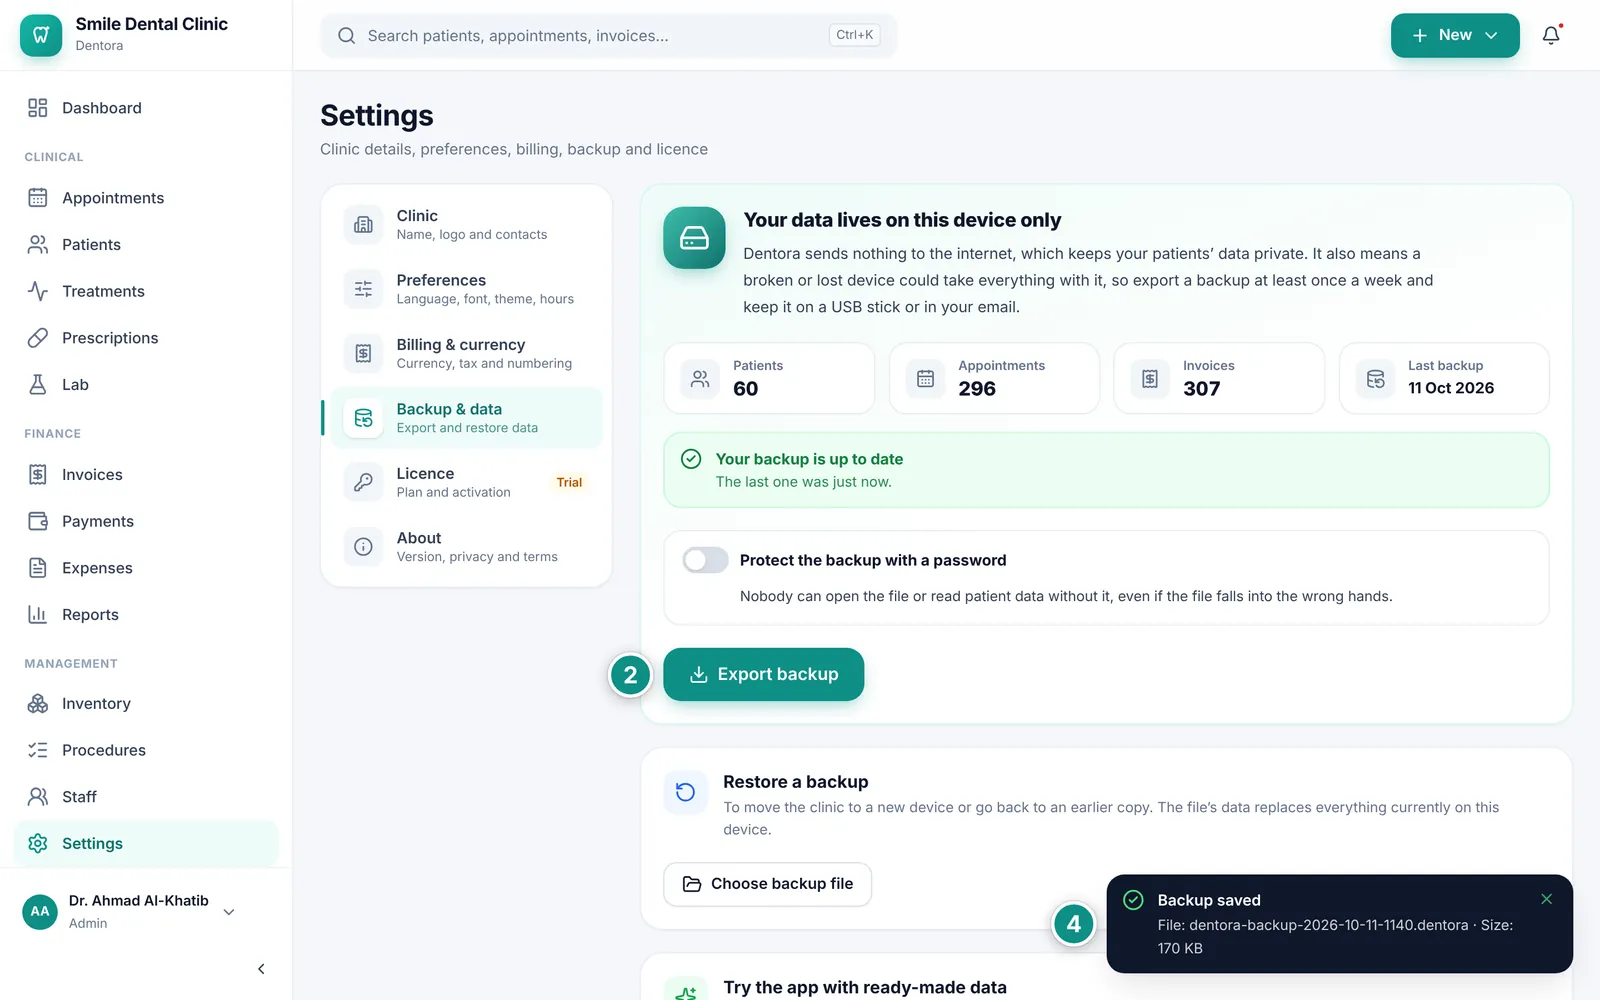
- Open Settings, then Backup & data.
- Click Export backup.
- On Windows a save window opens: choose where to keep the file, such as a USB stick, then click Save. On Android the system’s save screen opens: choose a folder or Google Drive, then save.
- Wait for the Backup saved message with the file’s name and size, and keep the app open until it shows.
Protecting a backup with a password
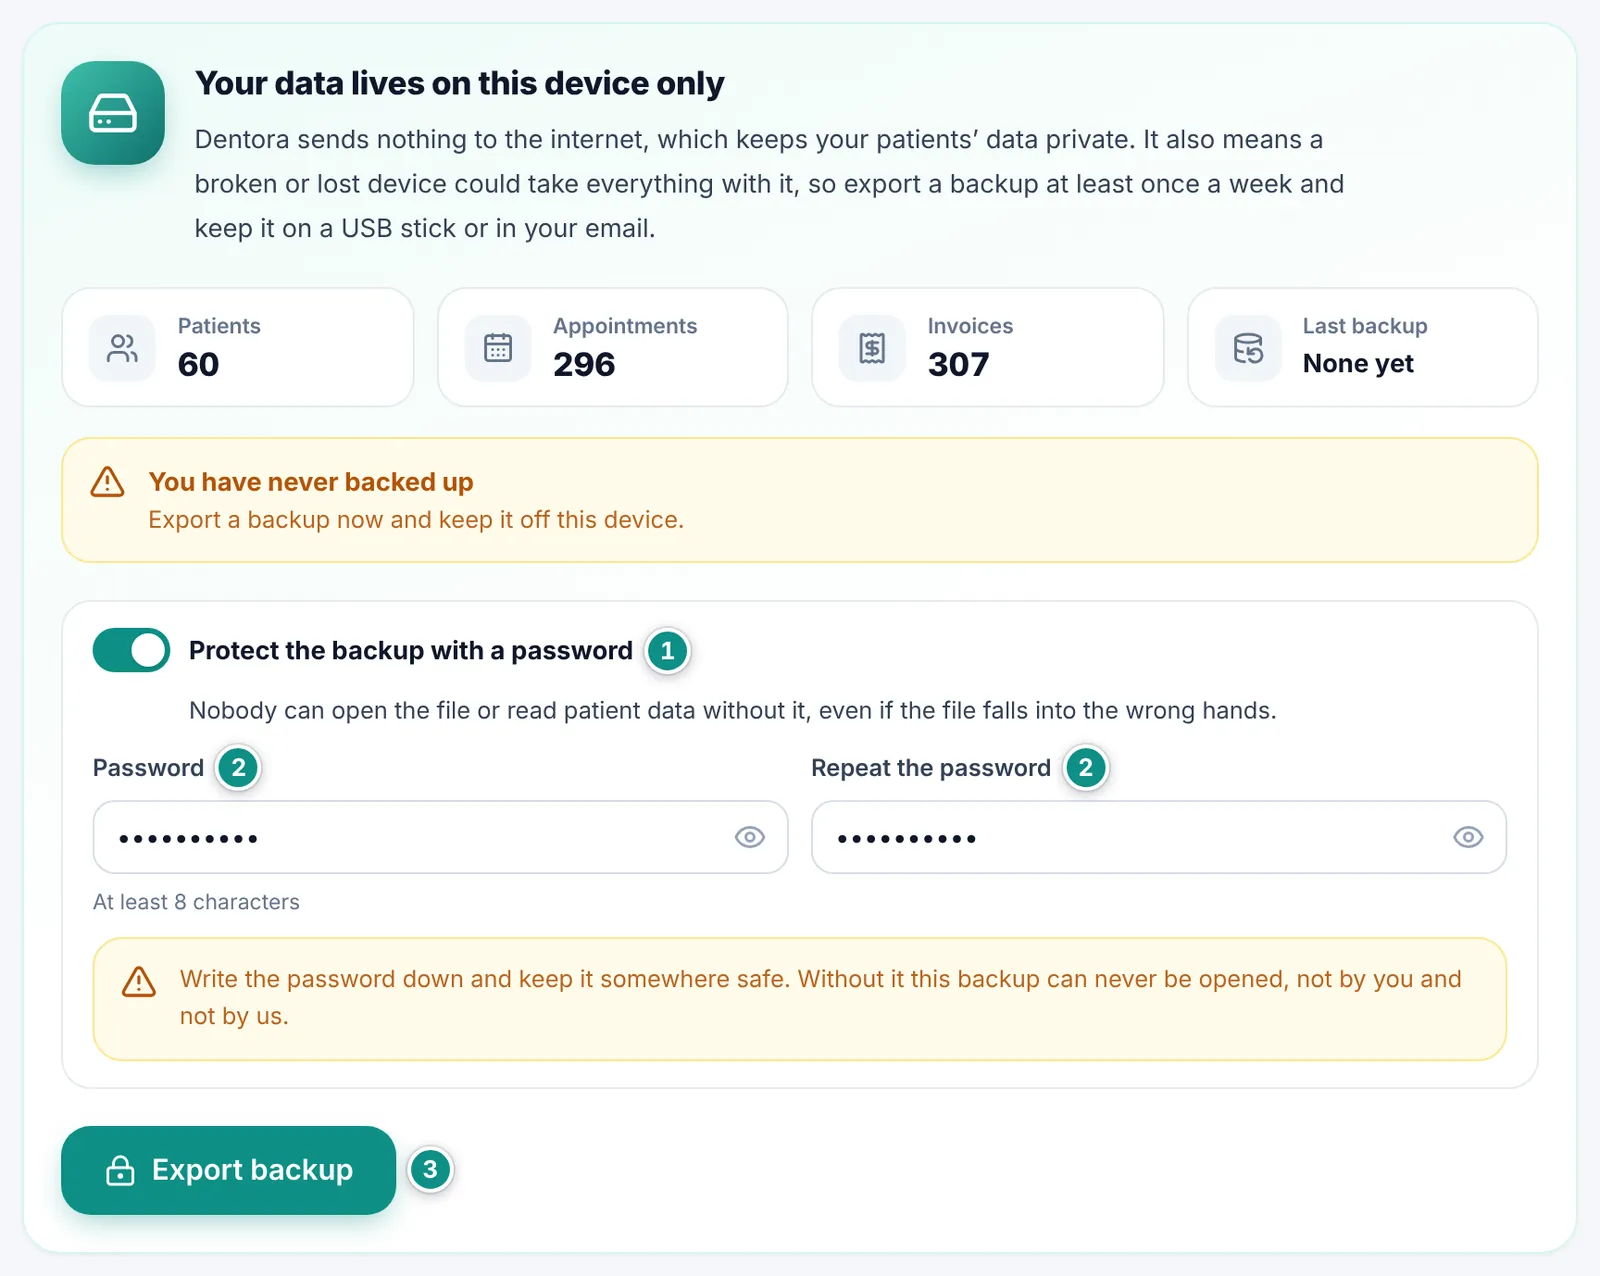
A backup file holds confidential medical data. Protect it with a password, and nobody can open it or read patient data without that password, even if the file falls into the wrong hands.
- Turn on Protect the backup with a password above the export button.
- Type the Password (at least 8 characters), then Repeat the password.
- Click Export backup and save the file as usual.
Where to keep your backups
Always keep your backup off the device Dentora runs on: on a USB stick or an external disk, in Google Drive or OneDrive, or sent to yourself by email or WhatsApp. Ideally keep one copy outside the clinic, at home for example.
Every few months, try a restore on another device to be sure your backups are sound.
Restoring a backup
A restore brings the clinic back as it was on the day of the backup. Note: the file’s data replaces everything currently on this device.
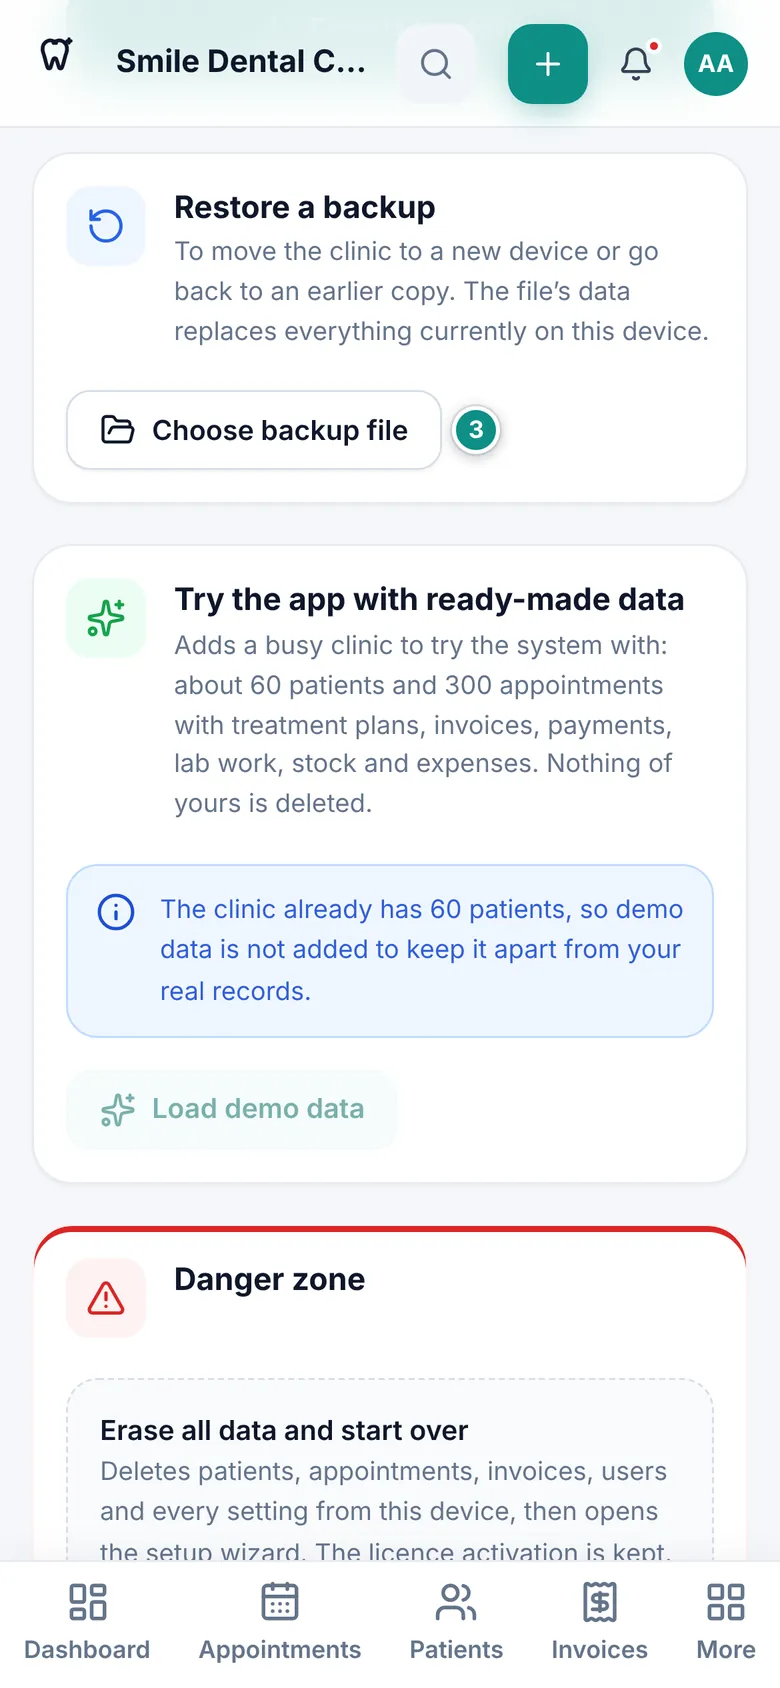
- In Settings → Backup & data, click Choose backup file.
- Choose the backup file (it ends in .dentora, or .json for older backups).
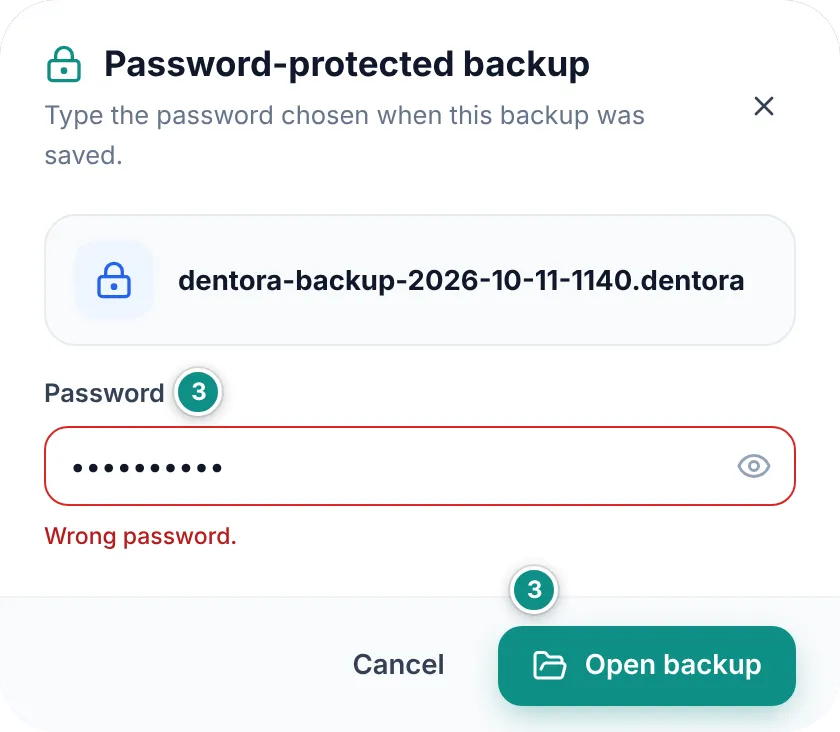
- If the backup is password-protected, type the password and click Open backup.
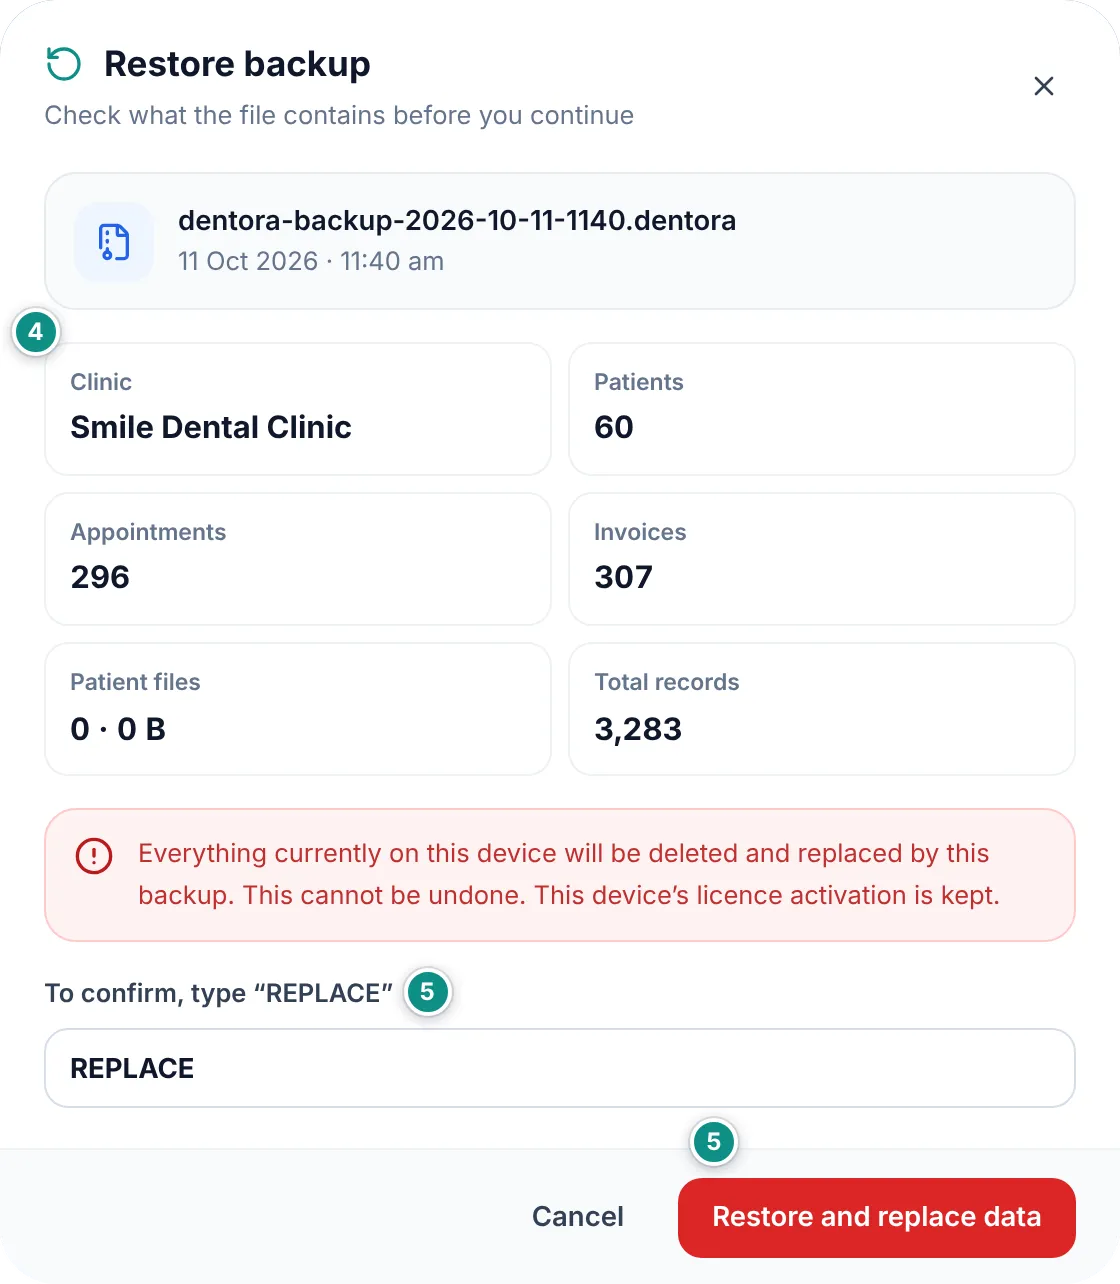
- Check what the file holds: the backup date, the clinic’s name, and the numbers of patients, appointments, invoices, patient files and records.
- Type REPLACE in the confirmation box and click Restore and replace data. Dentora restarts a moment later.
Moving the clinic to a new device
When you get a new computer or phone, you move the whole clinic to it with a backup file, without typing anything in again.
- On the old device, save a fresh backup (password-protected, ideally) and bring the file to the new device: on a USB stick, through Google Drive, or by sending it to yourself.
- Install Dentora on the new device. See Installing on Windows and Installing on Android.
- On the setup wizard’s first screen, tap Restore your data from a backup and choose the file. See Restoring instead of setting up. If the new device is already set up, use Choose backup file on the backup page instead.
- Sign in with your usual name and PIN: the team accounts and their PINs are in the backup.
- Activate the licence again: the new device has a new device number, so ask for an activation code for it. See Licence.
Demo data and erasing everything
To try Dentora before you start, click Load demo data in the Try the app with ready-made data card: it adds a busy clinic with about 60 patients and 300 appointments, with treatment plans, invoices, payments, lab work, stock and expenses. The button works while the clinic has fewer than three patients, so demo data never mixes with your real records.
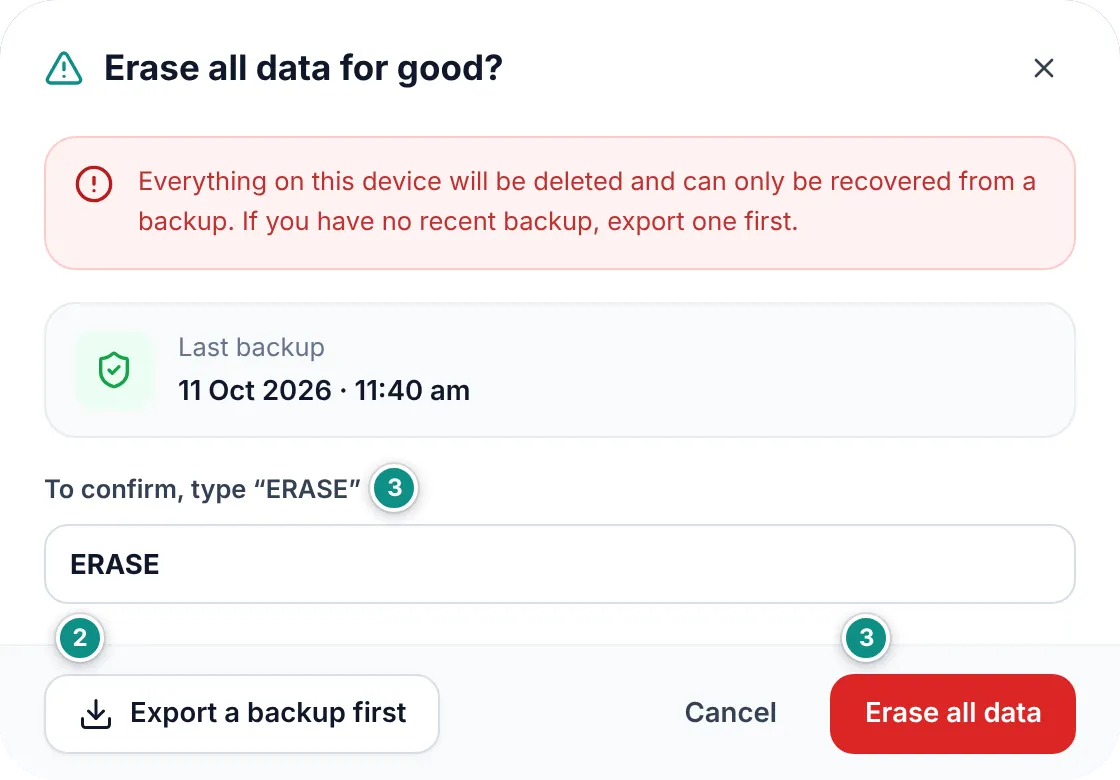
When you have finished trying, or want to start from scratch, use the Danger zone:
- Click Erase all data in the Danger zone at the bottom of the page.
- If you have no recent backup, click Export a backup first in the same dialog.
- Type ERASE in the confirmation box and click Erase all data. The setup wizard opens again.