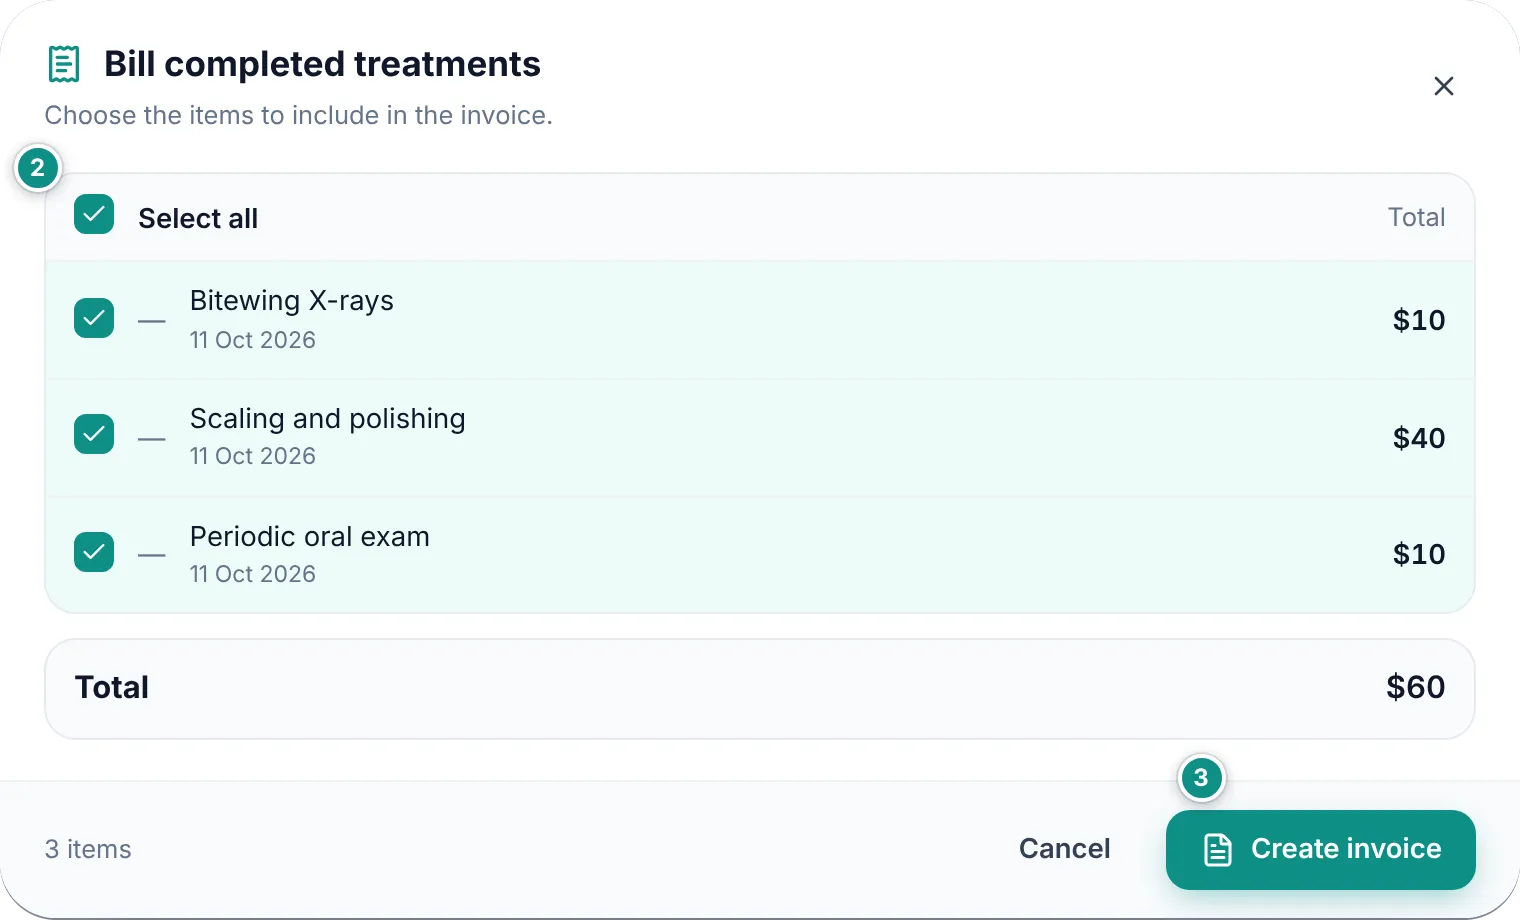
Each patient’s treatments are managed in the Treatments tab of their file. Here you propose a priced plan, follow it item by item, and turn the completed work into an invoice.
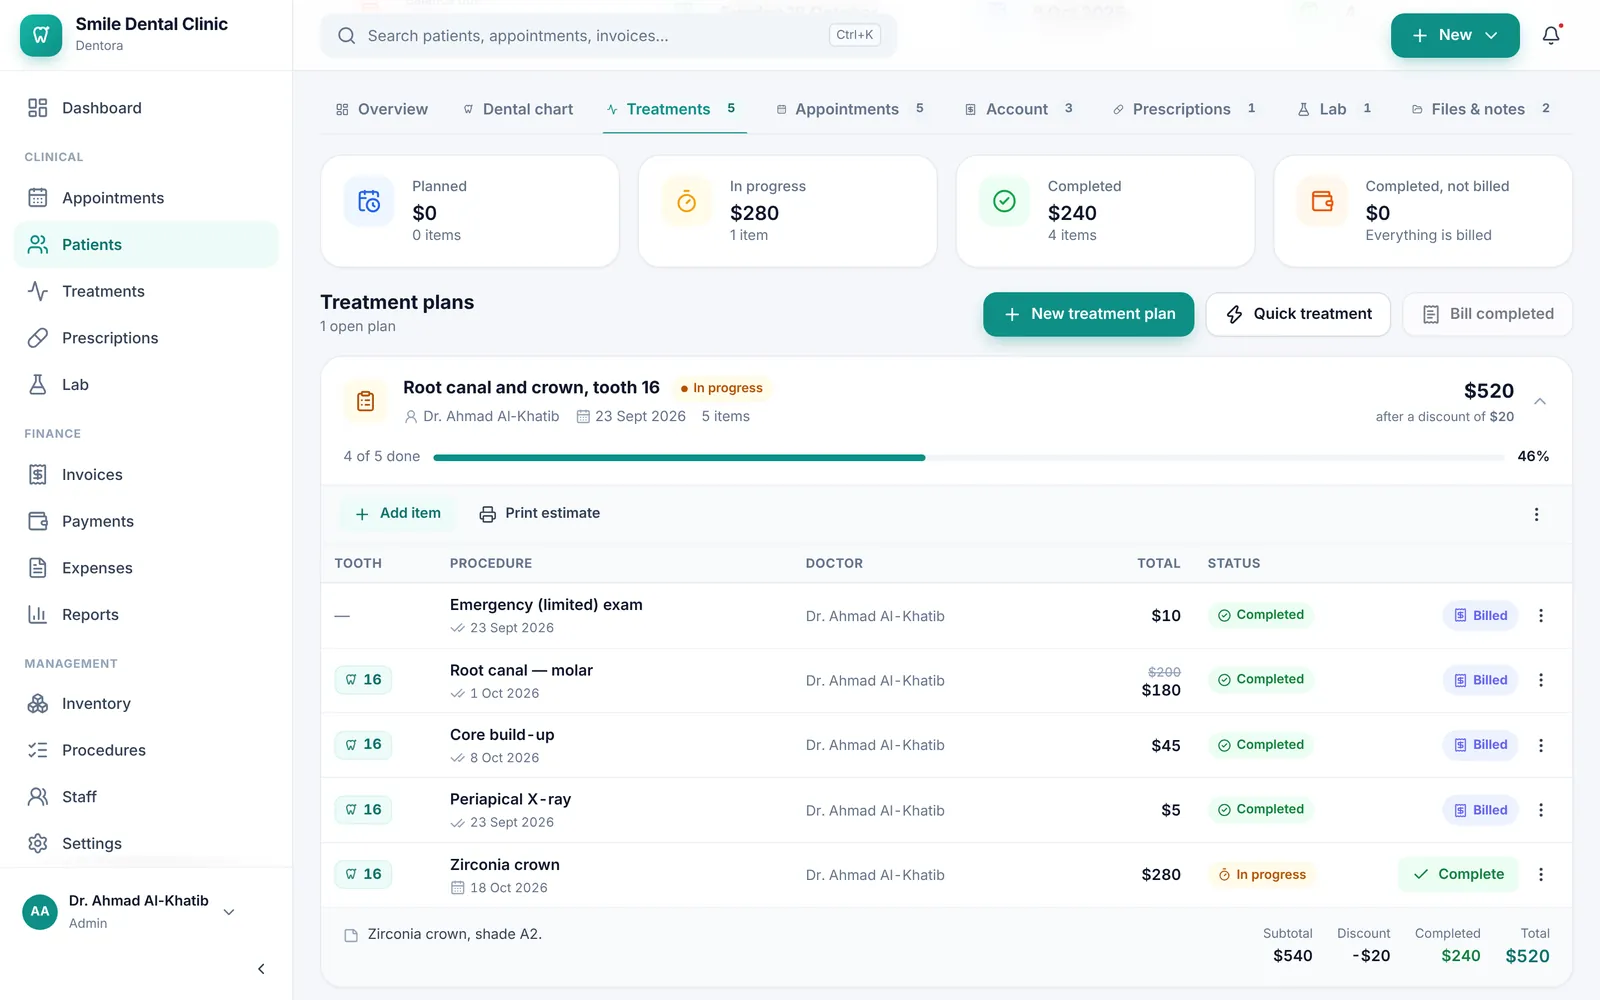
Four cards sit at the top: Planned, In progress, Completed and Completed, not billed, each with the value and number of items. Below them come the treatment plans, open ones first, then the Treatments outside plans card for quick treatments.
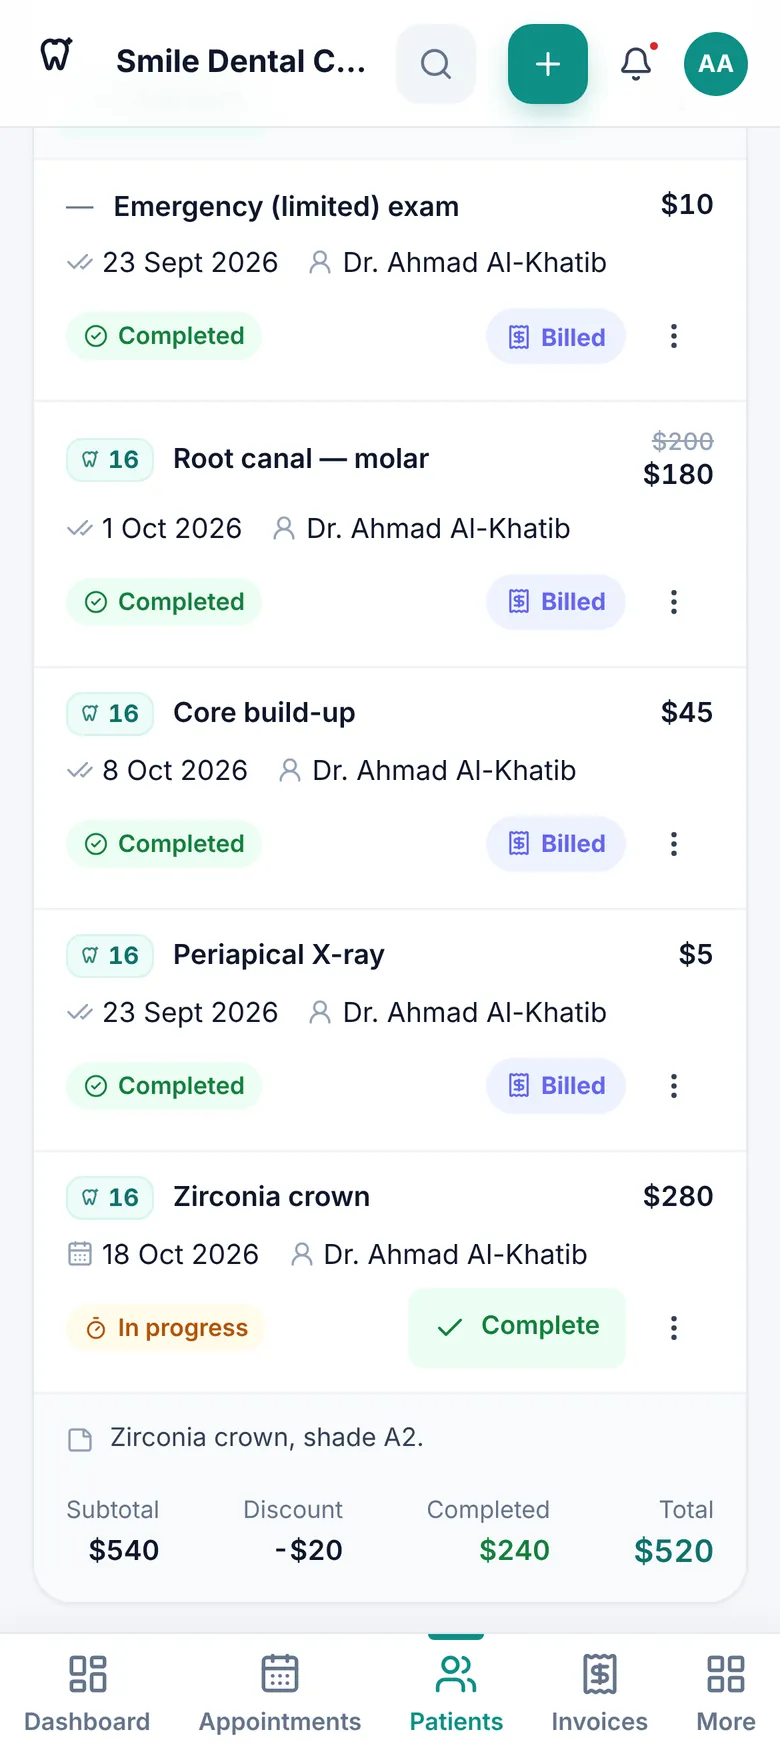
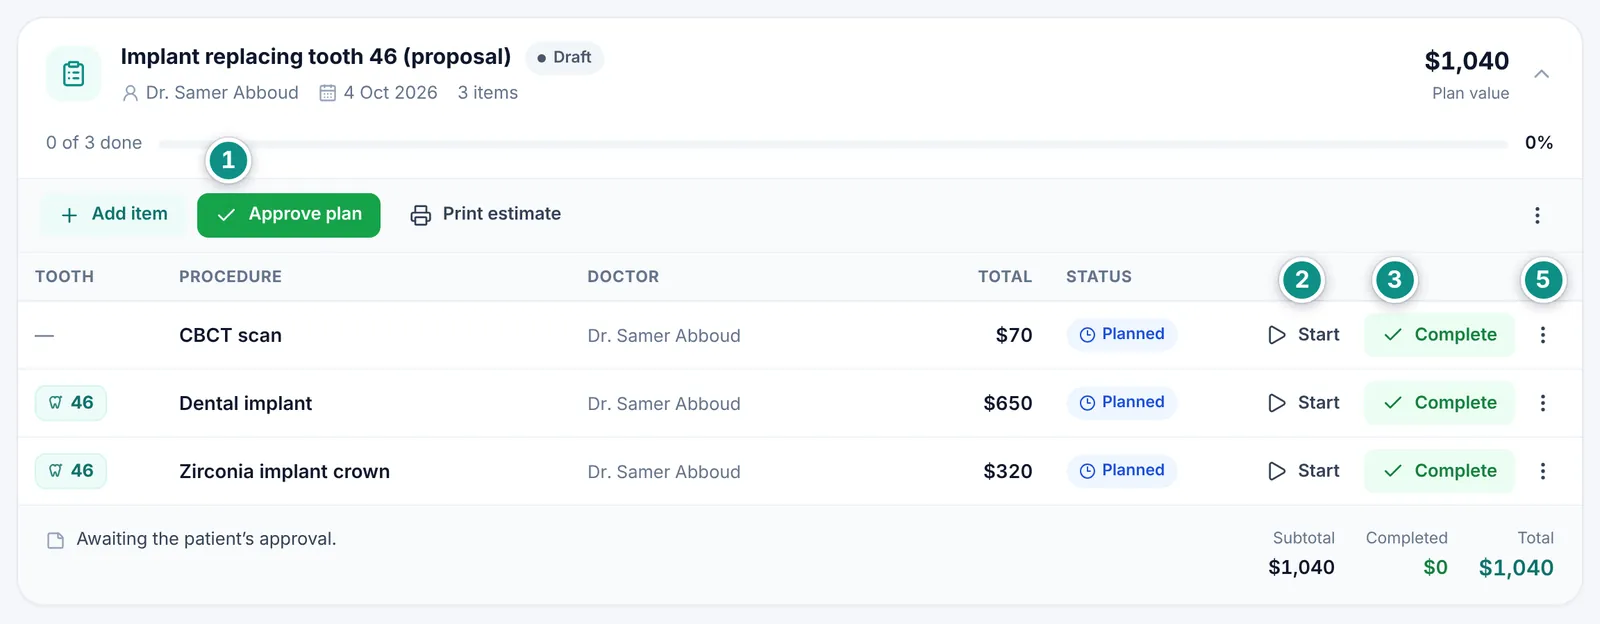
Each plan has a progress bar showing how much is done, and a table of its items: tooth, procedure, doctor, amount, status and action buttons.
Start a treatment plan when you propose several procedures. A plan starts as a draft, and you approve it once the patient agrees.
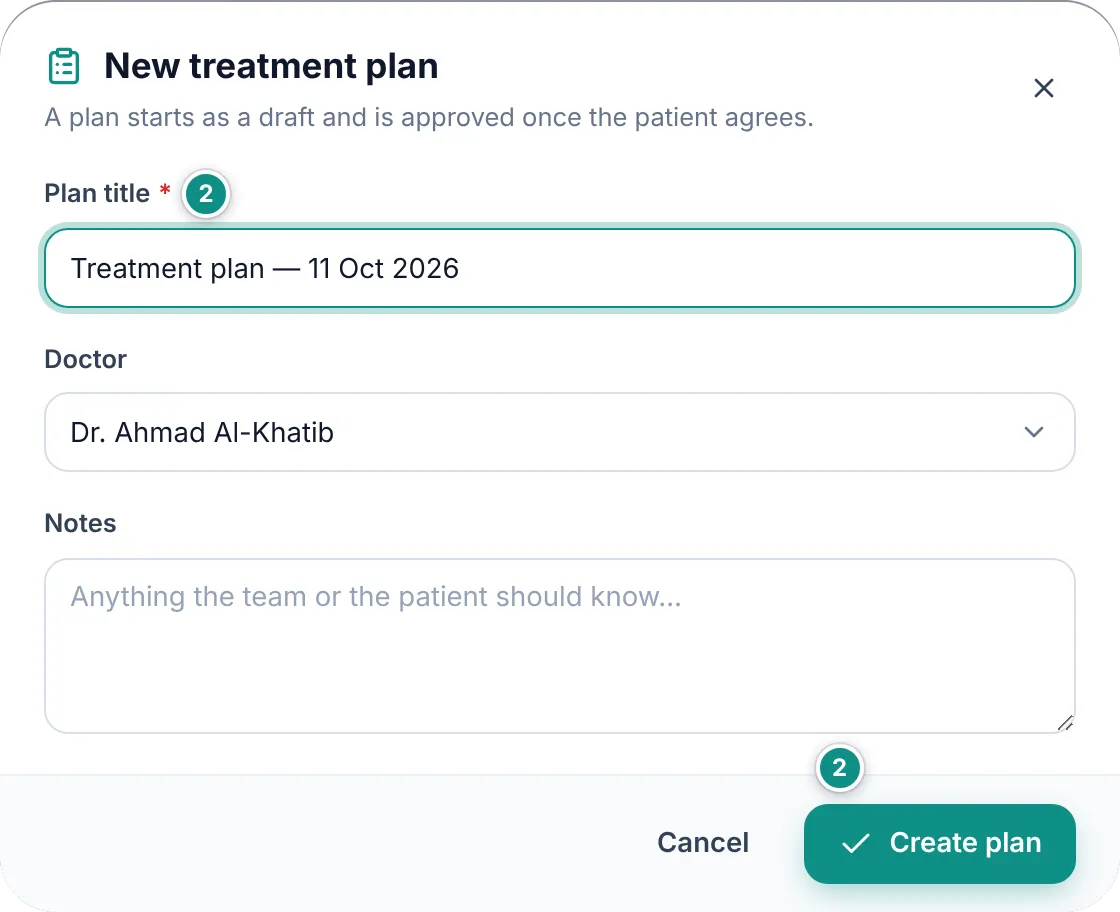
In the Treatments tab click New treatment plan.
Keep the suggested Plan title or type a clearer one, such as “Root canal and crown, tooth 16”. Choose the Doctor, add Notes if you wish, then click Create plan.
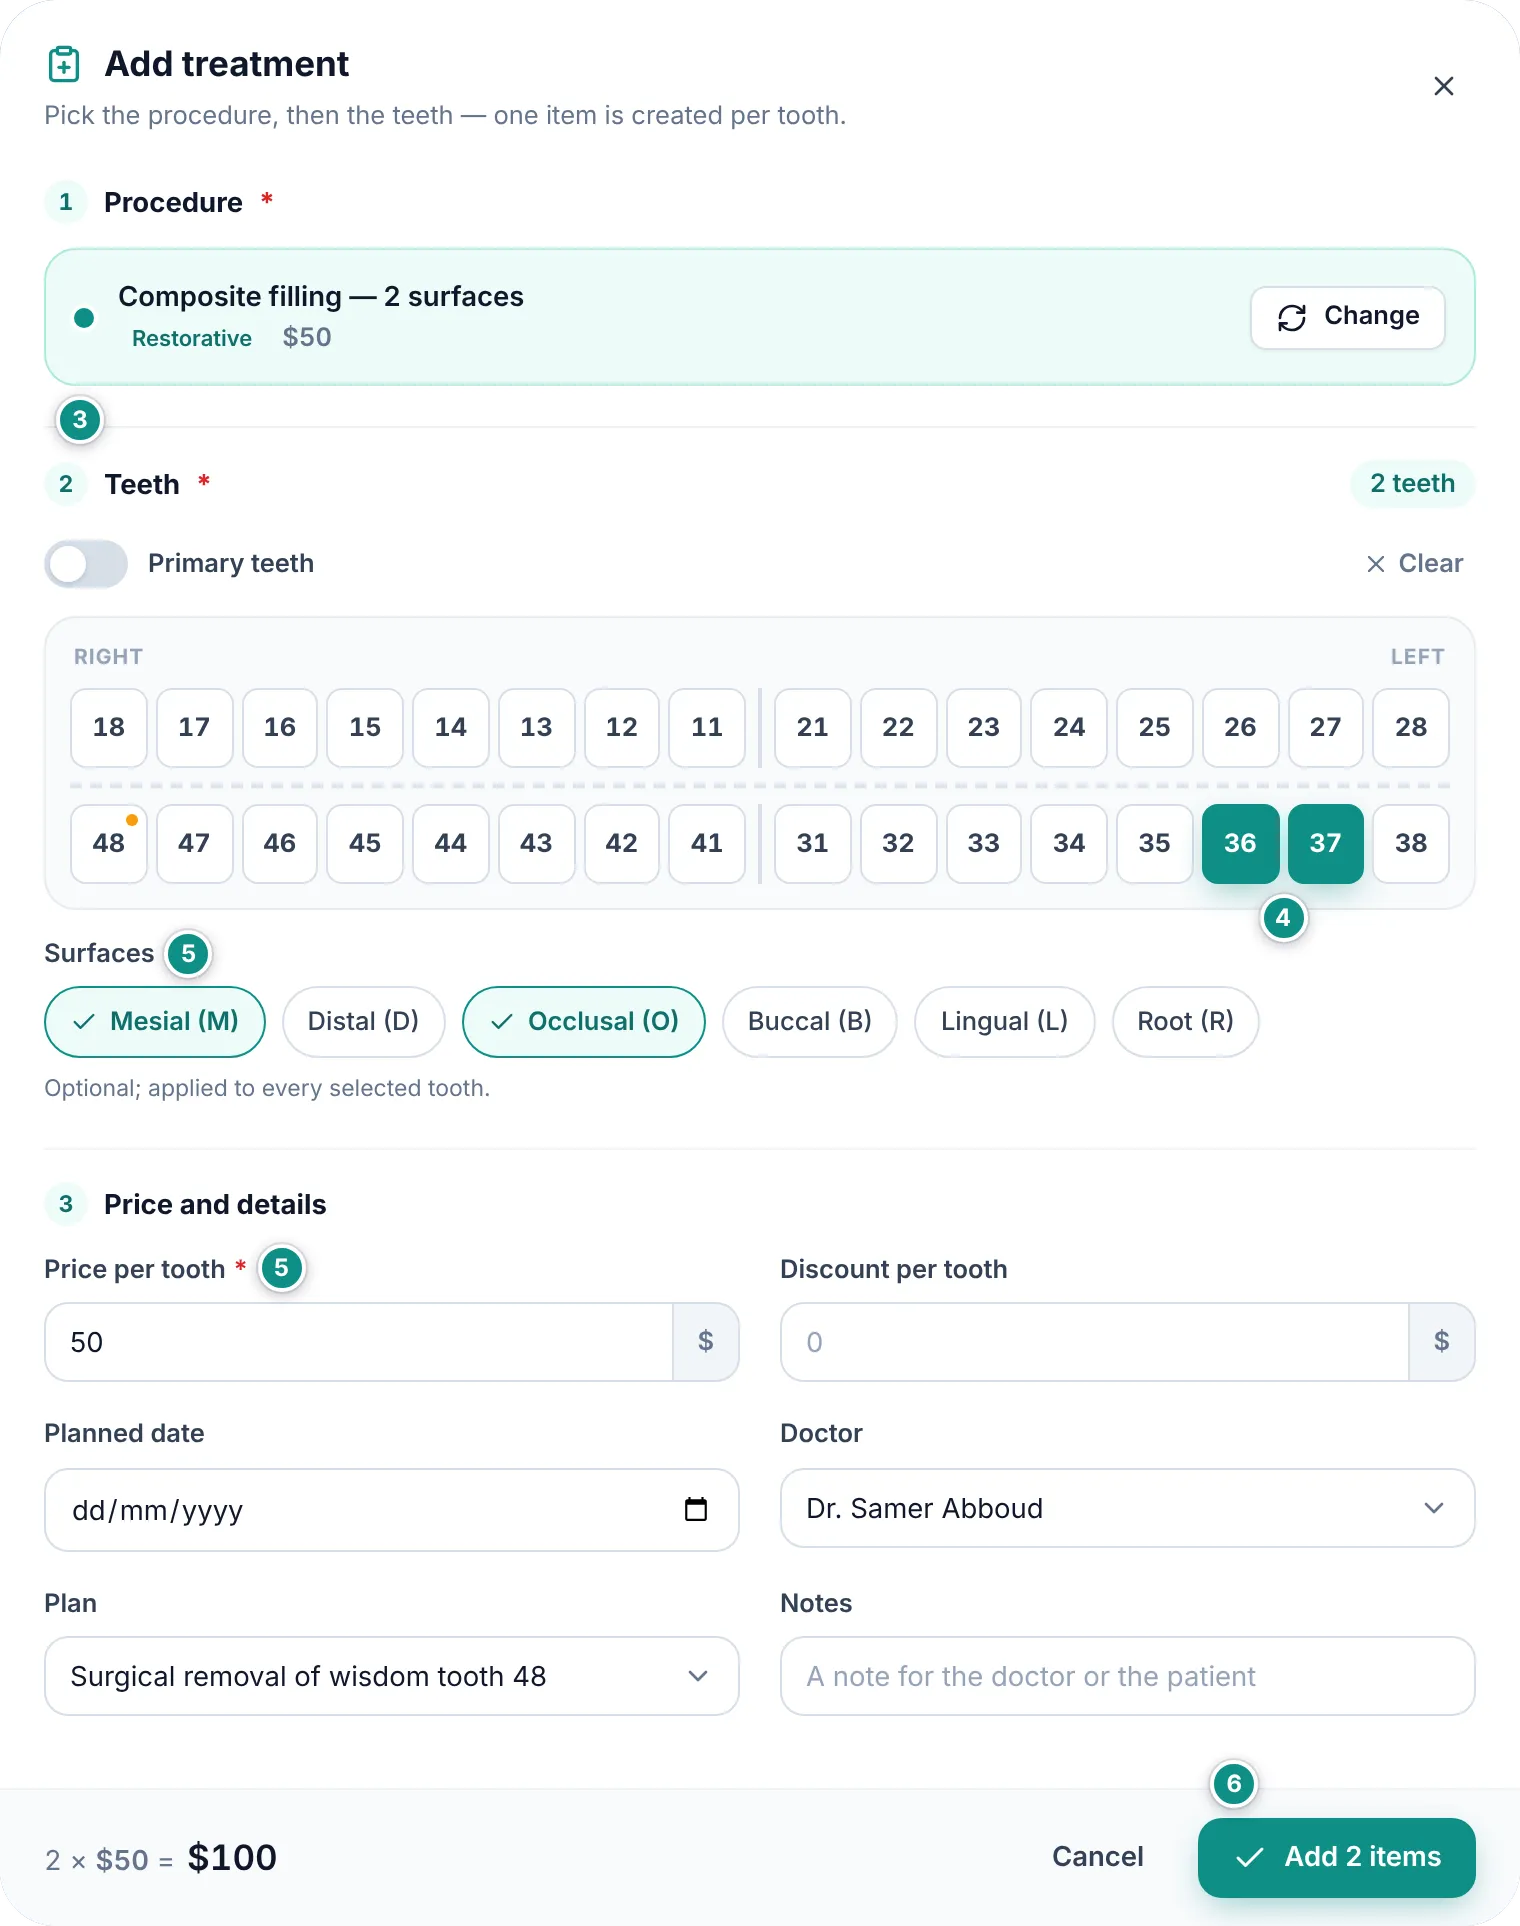
The Add treatment window opens straight away. Search for the procedure by name or code, or pick its category, then click it. Its price comes from your price list.
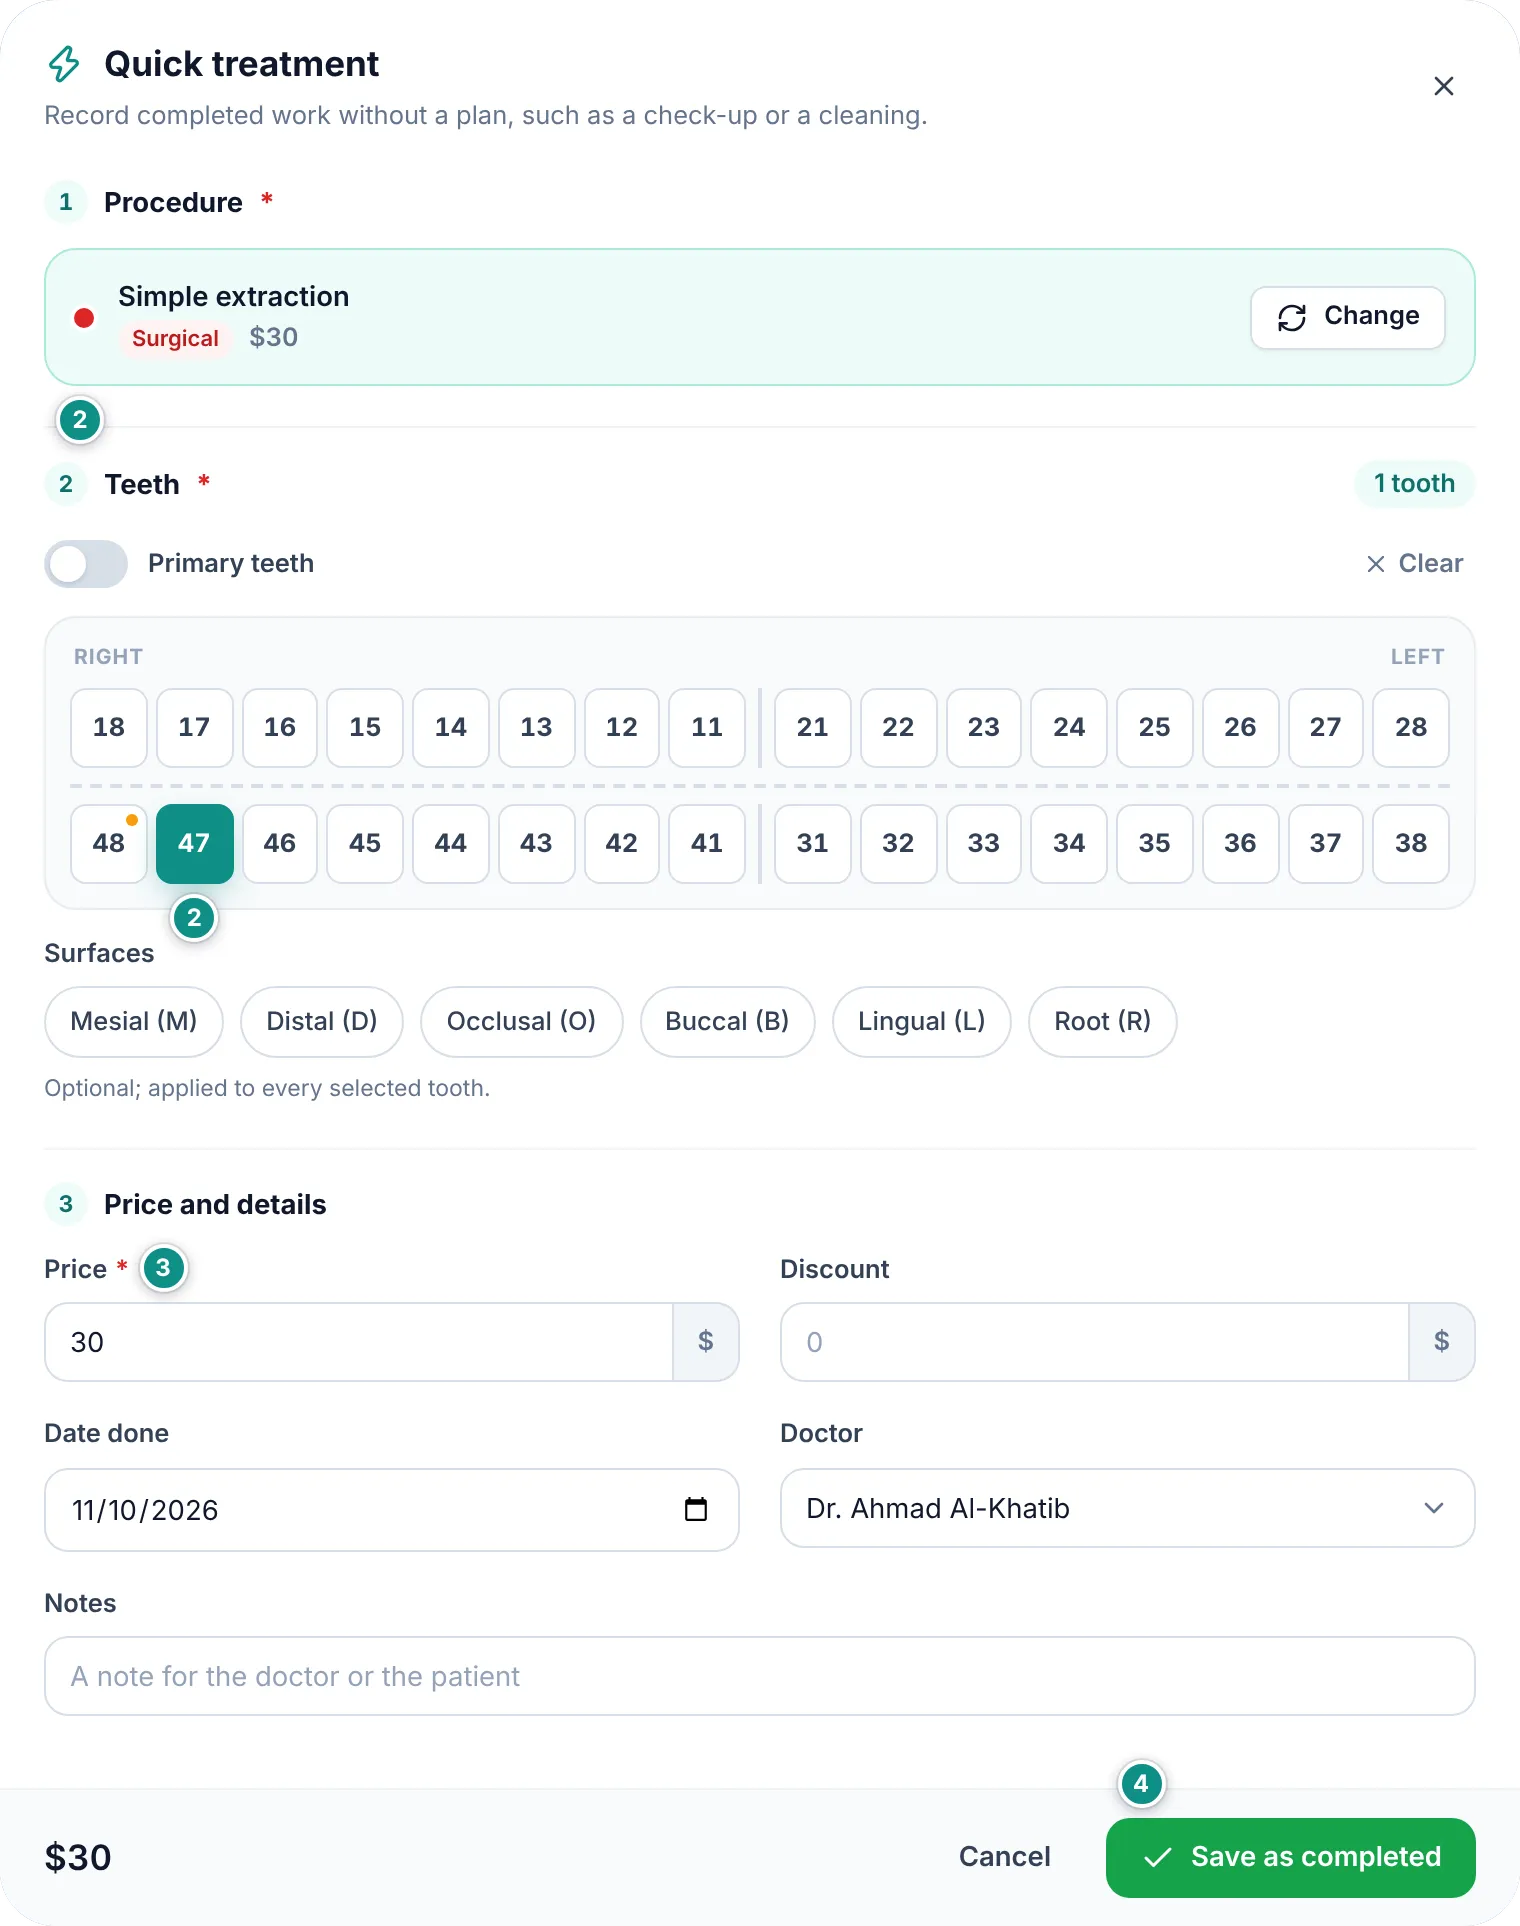
Click the teeth involved. You can pick several: each tooth gets an item of its own.
Pick Surfaces if needed, and adjust the Price and Discount (they read Price per tooth and Discount per tooth when you pick several teeth), the Planned date, Doctor and the item’s Notes.
Click Add item. The button counts the teeth, such as Add 2 items. To add more later, click Add item in the plan’s bar.
Each item has four statuses: Planned, then In progress, then Completed, or Cancelled.
A plan starts as Draft and becomes Approved when you click Approve plan. Its status then follows its items by itself: In progress as soon as work starts on one of them (even if the plan was never approved), and Completed when every item is done. A cancelled plan shows Cancelled.
When the patient agrees, click Approve plan. The button is on drafts and works once they have at least one item.
When work takes more than one visit, such as a root canal, click Start on its row.
When it is finished, click Complete. Today is recorded as the date done.
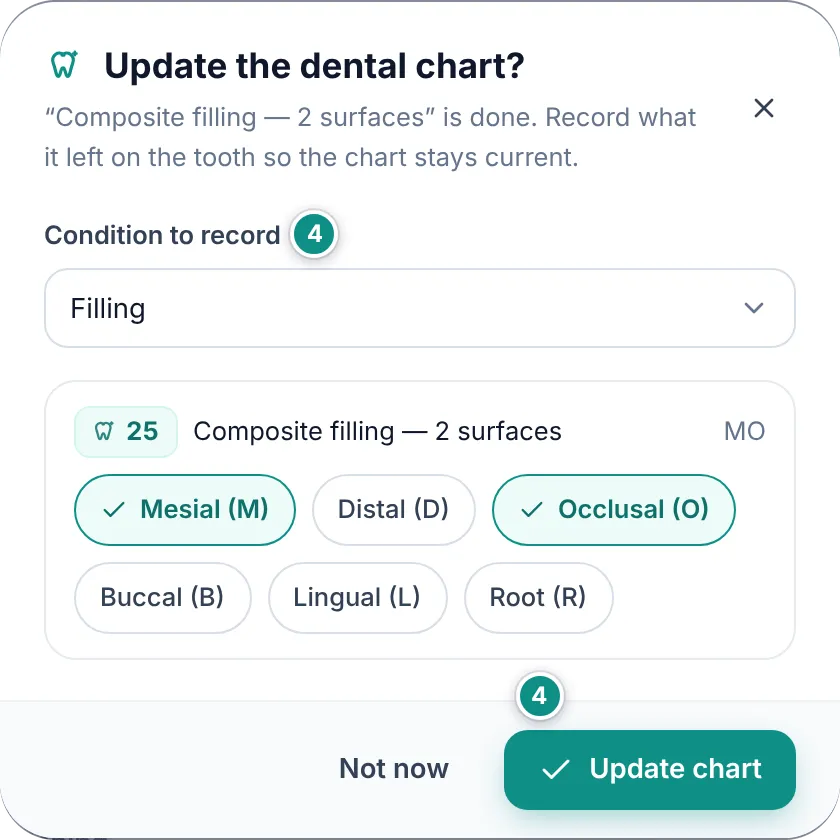
If the item is on a tooth and leaves a mark on the chart, such as a filling, a crown or an extraction, Dentora asks Update the dental chart? and suggests a finding, such as Filling after a filling or Crown after a crown. Check the Condition to record and the surfaces, then click Update chart, or Not now.
For the other actions open the ⋮ menu on the item’s row: Edit, Back to planned, Reopen, Cancel item and Delete. Restore brings a cancelled item back to planned.
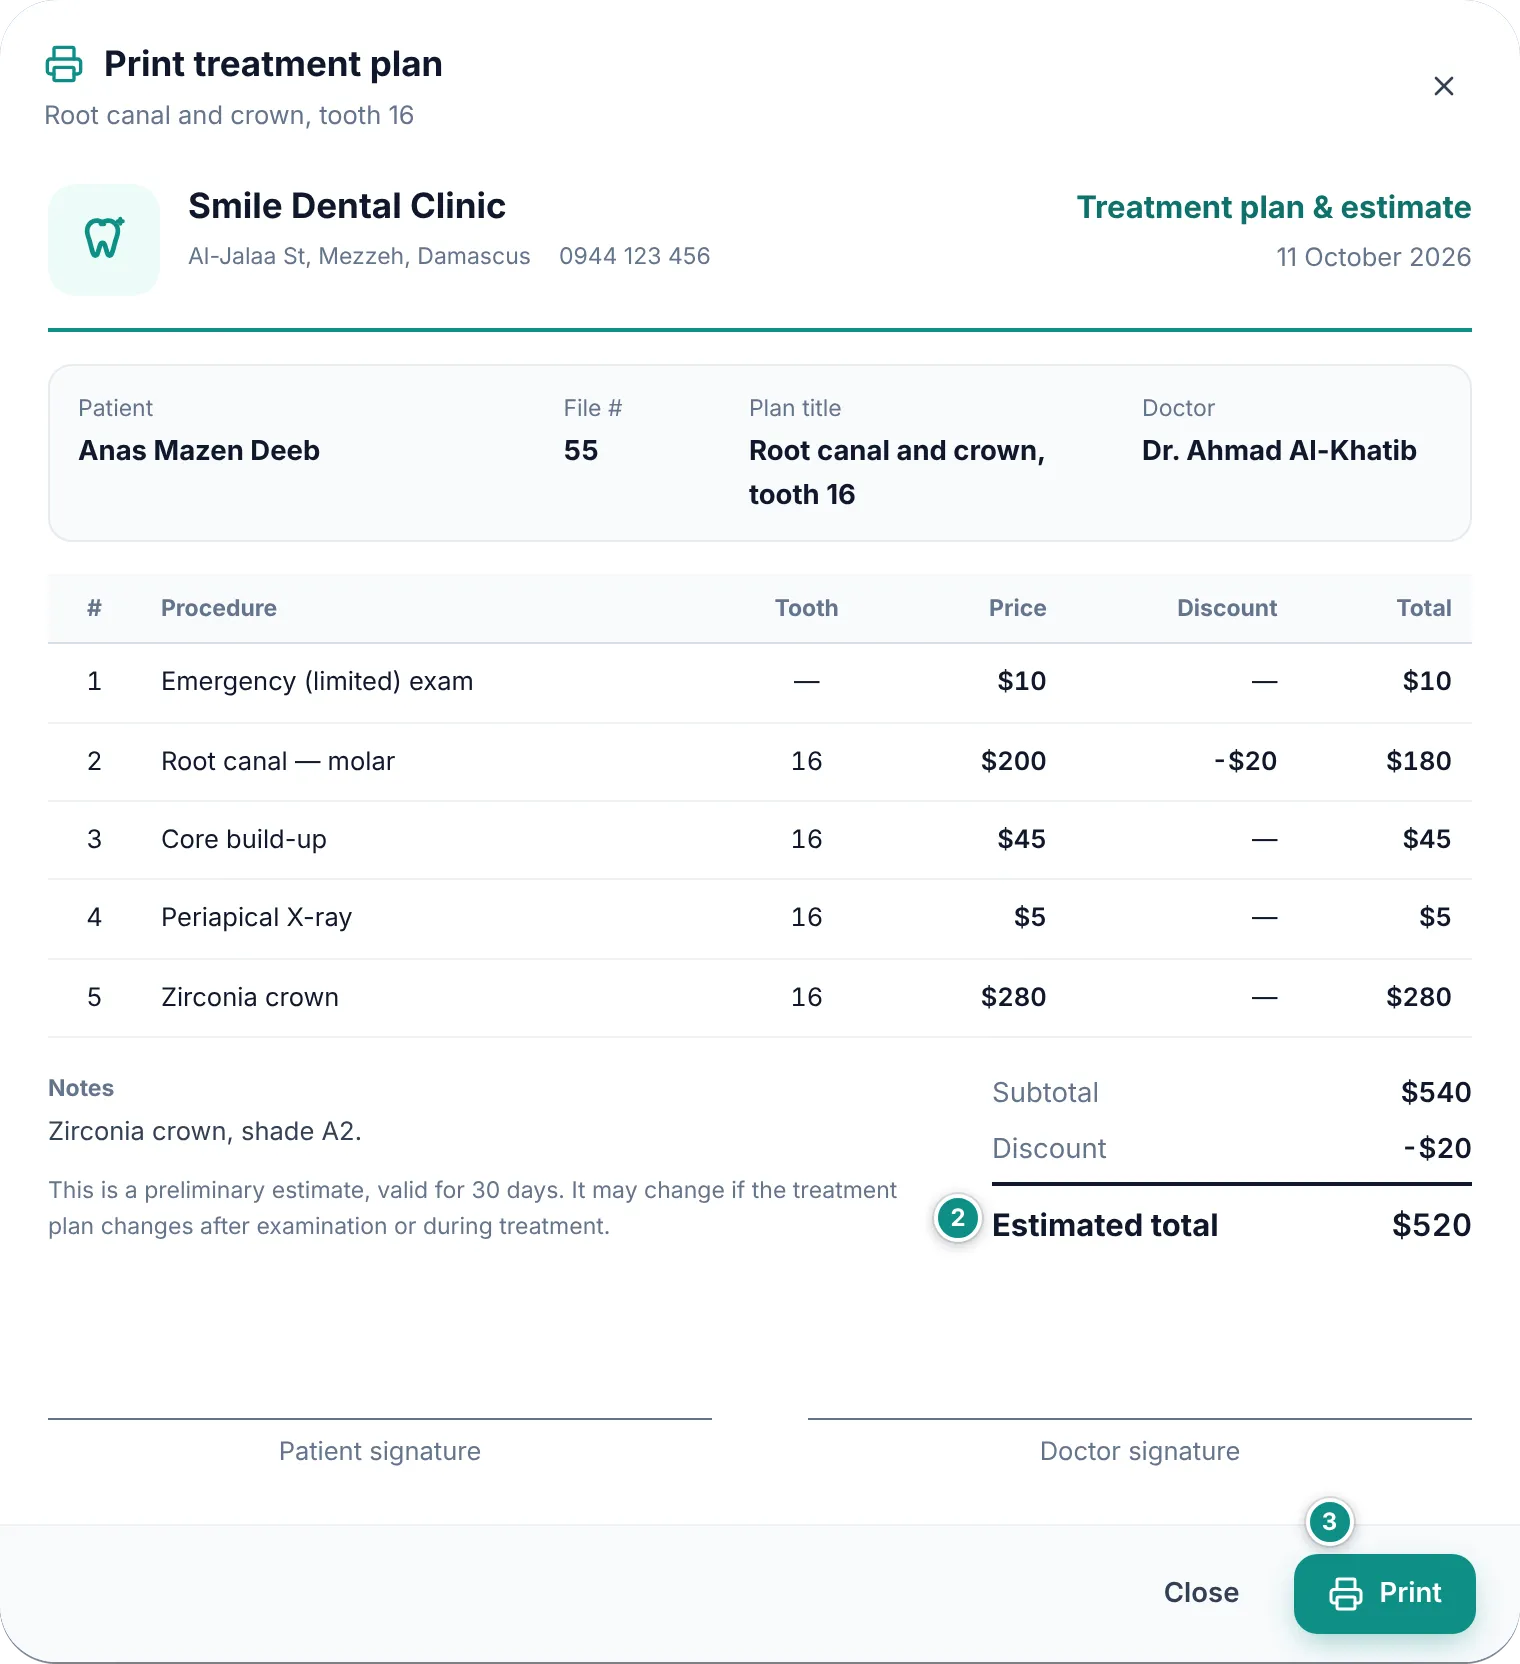
Print a cost estimate the patient can take home and sign. From the ⋮ menu in the plan’s bar you can edit, cancel or delete the plan.
Click Print estimate in the plan’s bar.
Check the sheet: the clinic letterhead, the patient and doctor, the procedures with their prices and discounts, then the estimated total and signature lines for the patient and the doctor.
Click Print, then choose a printer or save as PDF.
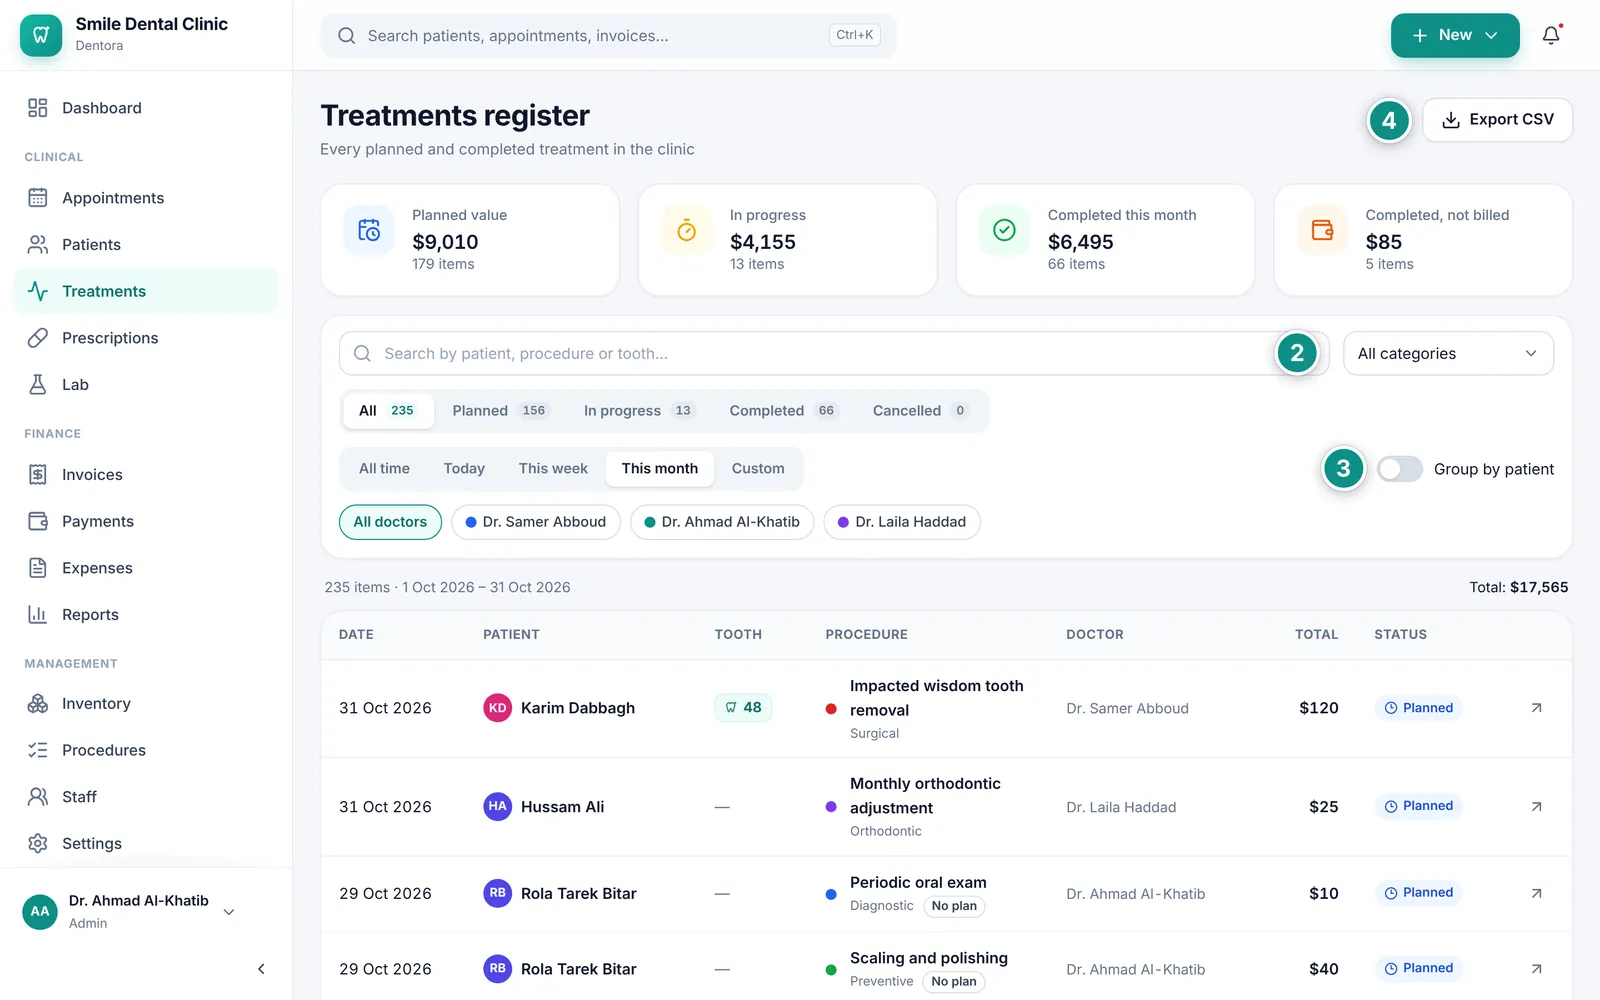
The Treatments page in the sidebar lists every planned and completed item in the clinic, for all patients. Open it to see what was done this month, what is waiting, and what is not billed yet.
Open Treatments in the sidebar. It opens on This month.
Narrow the list by searching for a patient, procedure or tooth number, or by category, status, period or doctor.
Turn on Group by patient to see each patient’s items together, with their total.
Click Export CSV to save the list on screen as a file you can open in Excel.
Click any row to open the Treatments tab of that patient.
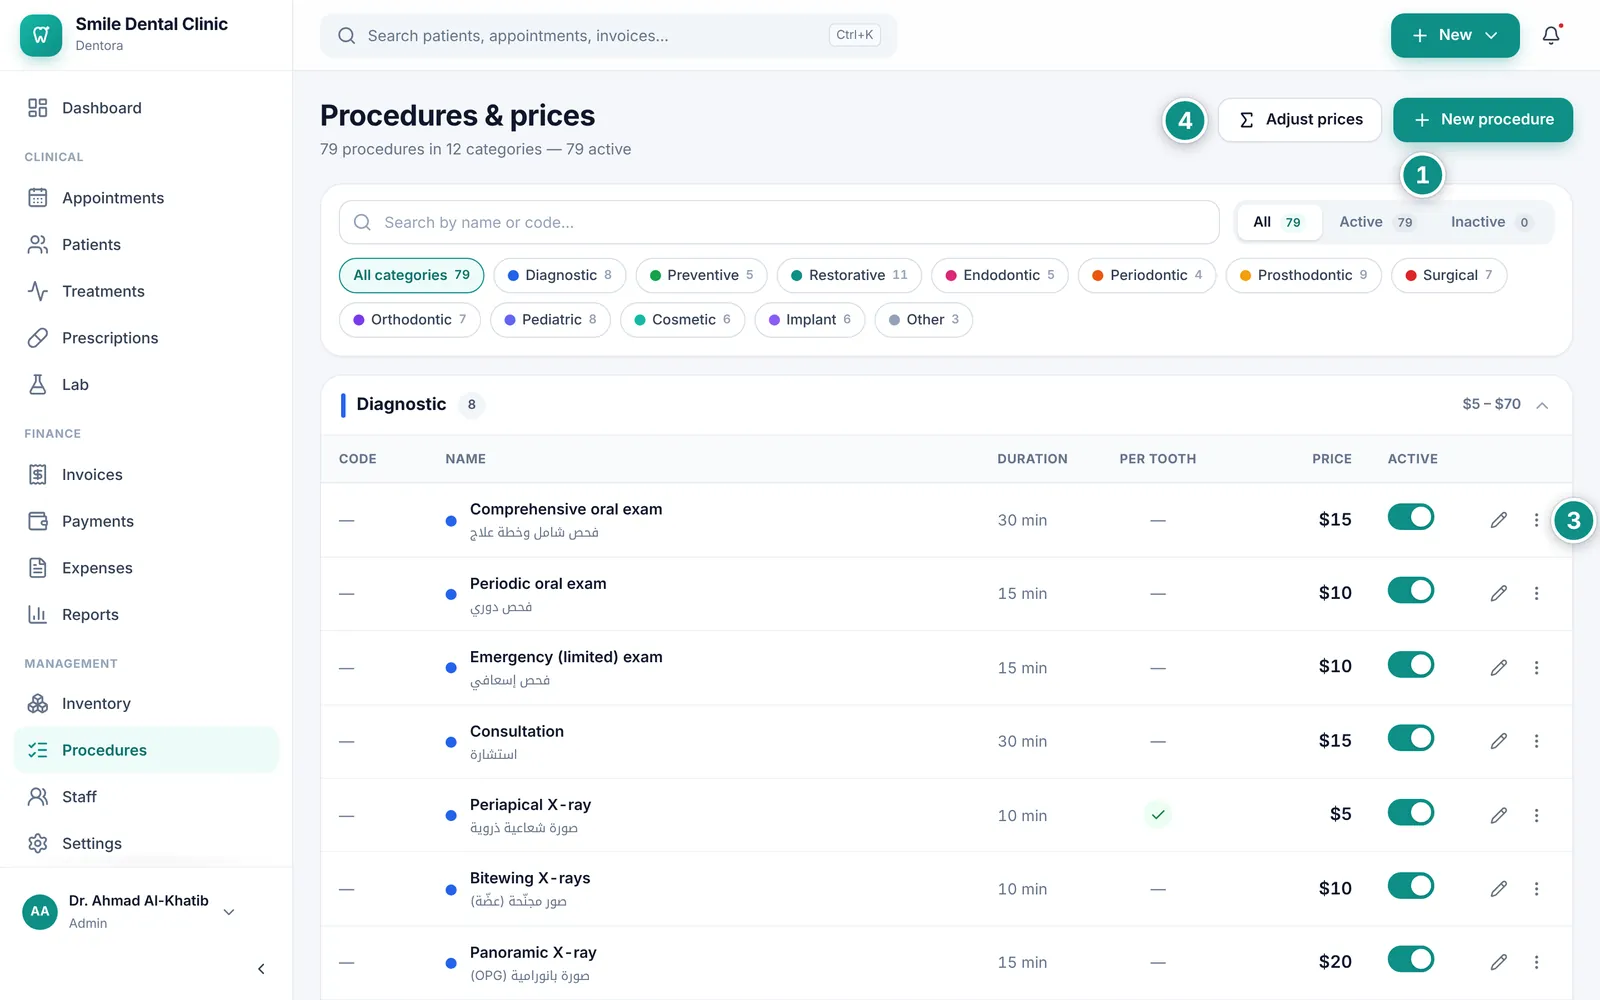
This list sets each procedure’s name and price as they appear on plans and invoices. The admin finds it under Procedures in the Management part of the sidebar.
When Dentora is set up, a ready list of 79 common procedures in 12 categories is loaded, with suggested prices you can change as you like.
To add a procedure click New procedure, type the Name, choose the Category and type the Price, then click Save.
If you like, fill in the English name, Code, Usual duration and Colour, and turn on Needs a tooth number for work done on a specific tooth.
To edit a procedure click its row. Its ⋮ menu has Duplicate, Deactivate and Delete.
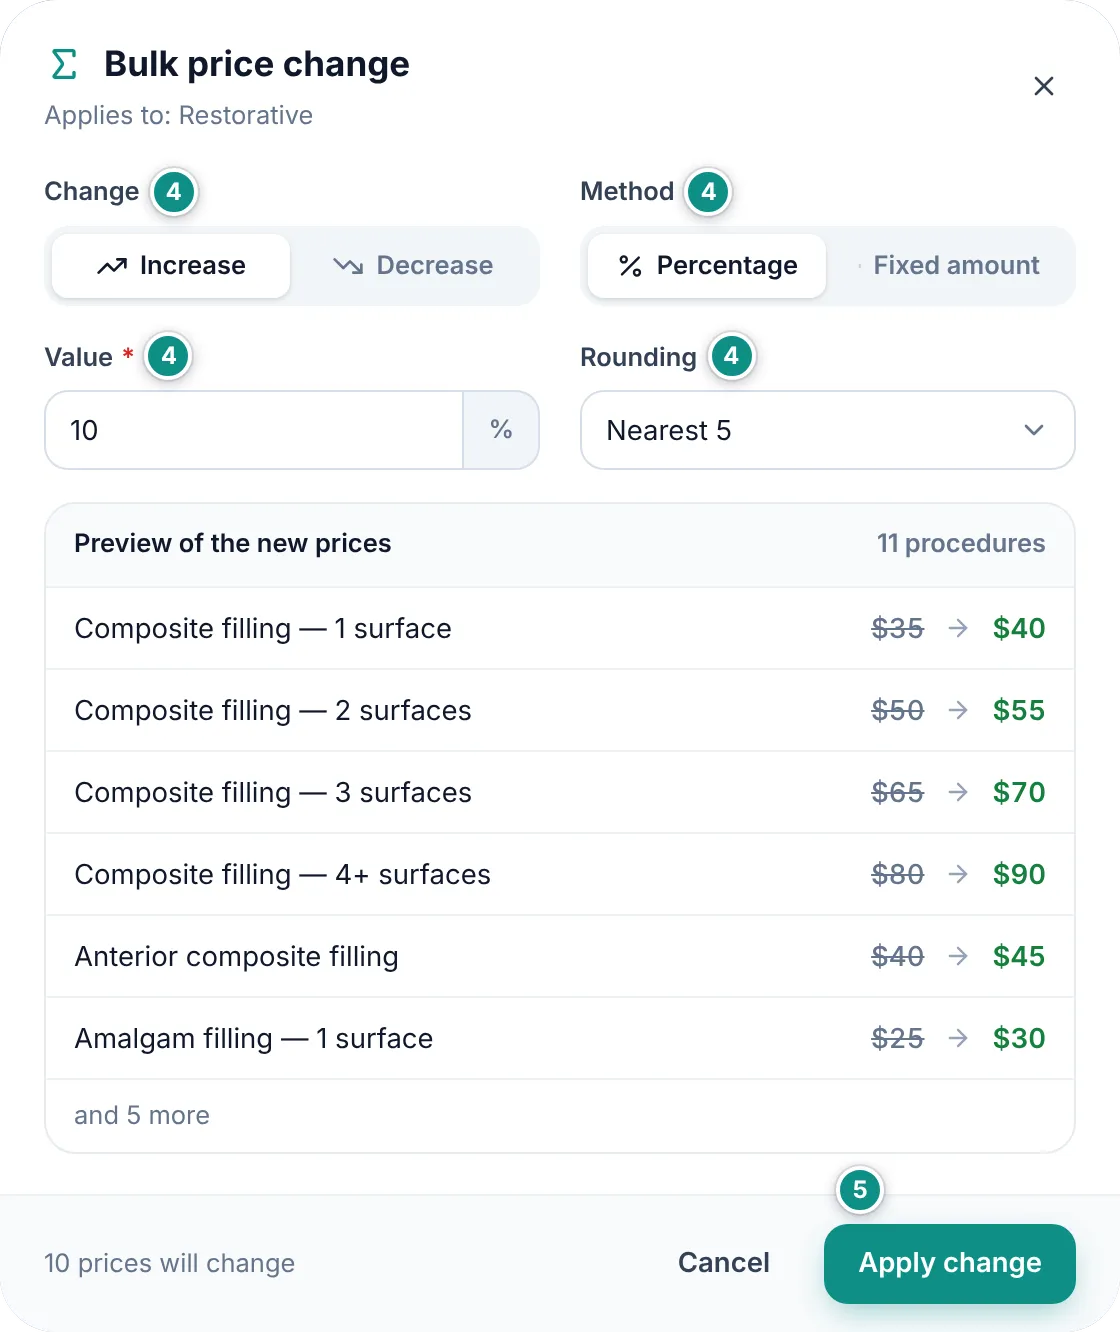
To raise or lower prices in one go, pick a category first if you want, then click Adjust prices. Choose Increase or Decrease, Percentage or Fixed amount, type the Value and choose the Rounding.
Check the Preview of the new prices, then click Apply change.